
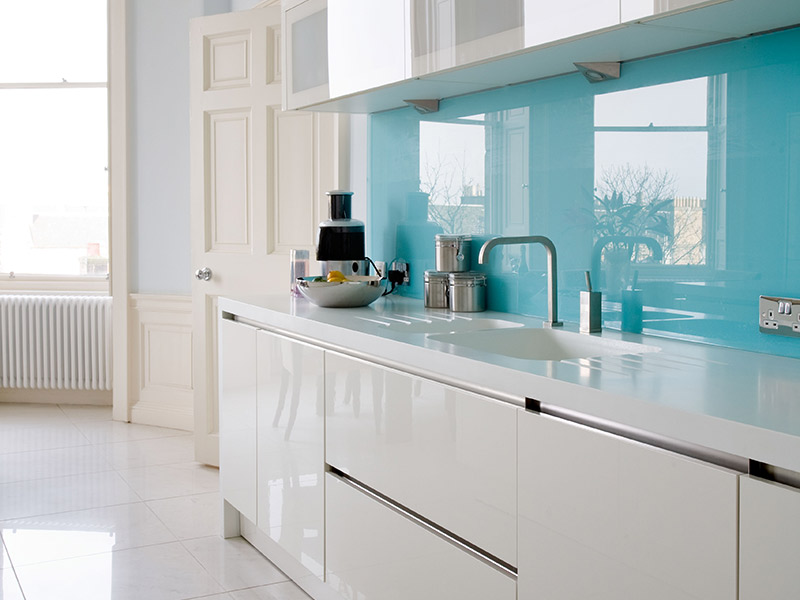
A glass splashback is fitted by first cutting and preparing the glass to the required size and shape, including any socket, switch or other necessary cut-outs. The wall is then prepared, the finished panel is checked in position, and a compatible fixing material is applied before the glass is carefully positioned and aligned.
Once the fixing material has cured, the edges and surrounding junctions can be sealed and finished where required.
With bespoke glass, much of the precision required for a successful installation occurs before the panel is fixed to the wall. The glass needs to be correctly cut, shaped and prepared so that it is ready to sit cleanly within the intended space.
How Is a Glass Splashback Cut Before Fitting?
Before a glass splashback can be fitted, the panel needs to be cut to the required size and shape.
A straightforward splashback may be a single rectangular piece of glass, while other installations need to work around cabinetry, worktops, corners, sockets, switches and other features within the room.
These details are incorporated into the glass before it reaches the fitting stage.
At Sky Bespoke Glass, we cut bespoke glass to meet the project’s requirements, helping the finished splashback sit naturally alongside the surrounding cabinetry, worktops and finishes rather than appearing as a standard panel added afterwards.
Edges can also be carefully finished, while the choice of glass and colour will influence how the splashback interacts with the wider interior.
The aim is for the finished piece to arrive at the installation stage already prepared for its intended position.
How Are Socket and Switch Cut-outs Made in a Glass Splashback?
Sockets and switches are common within kitchen splashback areas, so bespoke glass may need precisely positioned openings to accommodate them.
These cut-outs are created before the glass is toughened. The same applies to shaped corners, notches and other openings that form part of the finished panel.
This is an important difference between glass and other materials that can be easily trimmed during installation.
By the time a toughened splashback reaches the fitting stage, the socket and switch openings should already be formed in the glass. The panel can then be positioned so that these details align neatly with the surrounding fittings.
The quality of the cutting and finishing makes a noticeable difference here. Clean edges and accurately formed openings help the splashback integrate with sockets, cabinetry, worktops and other elements of the room.
Can Toughened Glass Be Cut After Manufacture?
Once glass has been toughened, it cannot simply be cut, drilled or reshaped afterwards.
Any socket openings, holes, notches, shaping, or edge work must be completed before the toughening process. Attempting to alter toughened glass afterwards can cause the panel to break.
This is one of the reasons the cutting and preparation stage matters so much with a bespoke splashback.
Unlike timber or other interior materials, a finished toughened-glass panel cannot normally be trimmed on site if an additional cut-out is required or a section needs to be altered.
The required shape and details, therefore, need to be incorporated before the panel reaches the final fitting stage.
How Is a Glass Splashback Fitted Step by Step?
Once the glass has been cut, prepared and processed for its intended position, the fitting itself can begin.
Step 1: Prepare the Wall
The surface behind the splashback needs to be suitable for installation.
It should be secure, clean, dry and sufficiently flat for the rigid glass panel to sit correctly. Loose material, significant irregularities or an unstable surface may need to be addressed first.
Unlike a flexible wall covering, glass will not simply follow substantial variations in the wall. The condition of the substrate can therefore influence both the appearance of the finished installation and the fixing method used.
Step 2: Check the Finished Glass
Before anything is permanently fixed, the finished panel should be checked carefully.
The glass should be reviewed for its shape, cut-outs, edge details and finish, while its intended position can be checked against sockets, switches, worktops, cabinets and neighbouring surfaces.
This is often referred to as a dry fit.
Checking the panel in position before applying the fixing material allows the installer to confirm that the glass sits as intended before the installation becomes permanent.
Step 3: Check the Position and Alignment
The splashback can then be carefully positioned to establish its relationship with the surrounding interior.
Alignment is particularly important because splashbacks commonly sit alongside the strong straight lines created by worktops, cabinetry, socket plates and appliances. Small inconsistencies can become noticeable once the installation is complete.
The glass should sit cleanly within the intended area, with suitable clearances around adjoining surfaces and fittings.
Care around the edges and corners is also important throughout positioning and installation.
Step 4: Apply a Suitable Fixing Material
Once the position has been confirmed, an appropriate fixing material can be applied.
The product used needs to be compatible with the glass finish and the surface behind it. This is particularly important with painted or decorative splashbacks, where an unsuitable adhesive could affect the appearance of the finished glass.
There is no reason to assume that one general-purpose fixing product is suitable for every splashback. The glass, backing, wall surface and relevant product guidance all need to be considered.
Step 5: Position the Splashback
The glass can then be carefully moved into its final position and aligned with the surrounding finishes.
A well-fitted splashback should sit neatly alongside worktops, cabinetry, sockets and other features rather than feeling visually separate from them.
For larger or more detailed pieces, positioning may require additional care because the panel’s weight and rigidity leave less room for adjustment once the glass is in place.
Step 6: Allow the Fixing Material to Cure
Once positioned, the splashback needs to remain undisturbed while the fixing material cures.
The required time will depend on the product being used and the installation conditions, so the relevant manufacturer’s guidance should be followed rather than relying on a universal timeframe.
Allowing the fixing system sufficient time to set helps ensure that the glass remains securely positioned before the surrounding area returns to normal use.
Step 7: Seal and Finish the Installation
Once the splashback is securely fixed, the final details can be completed.
Where appropriate, junctions around the glass may be sealed to create a clean transition between the splashback, worktop and surrounding surfaces. This can also help prevent moisture, cooking residue or debris from working behind the panel.
The finished installation should feel properly integrated into the room, with clean lines around cabinetry, sockets and adjoining materials.
A well-fitted glass splashback often appears simple once complete, even though considerable precision has gone into the cutting, preparation and fitting behind it.
Can a Glass Splashback Be Fitted Over Tiles?
In some situations, a glass splashback can be fitted over existing tiles, but the tiled surface must first be suitable.
The existing tiles should be secure, stable, clean and sufficiently flat for the glass to sit correctly. The proposed fixing material also needs to be compatible with both the splashback and the tiled surface.
If tiles are loose, damaged or significantly uneven, further preparation may be necessary before the glass is fitted.
Where the existing surface is suitable, installing glass over tiles can create a smooth, continuous appearance while concealing the grout lines beneath. It can therefore be a useful way of changing the appearance of a kitchen or other interior without necessarily removing the existing tiled finish.
Whether it is appropriate will ultimately depend on the condition of the surface and the requirements of the individual installation.
Can You Fit a Glass Splashback Yourself?
Some straightforward, pre-cut glass splashbacks can be fitted by someone who is competent and comfortable carrying out this type of interior work.
However, bespoke glass can require more consideration than simply applying adhesive and placing a panel against a wall.
The installation becomes more involved where the glass is large, shaped, divided into several panels or contains socket openings and other detailed cut-outs. Corners, decorative finishes, awkward access and precise alignment with surrounding cabinetry can also make fitting more demanding.
Another important consideration is that a finished toughened-glass splashback offers little scope for alteration during fitting. Where several details need to align precisely, careful preparation and positioning become particularly important.
Professional fitting can therefore be worthwhile where the glass or installation is more complex, or where achieving a particularly clean finish is important.
The appropriate approach depends on the splashback, the wall, the installation itself and the experience of the person carrying out the work.
Why Do Precision Cutting and Careful Fitting Matter?
With bespoke glass, cutting and fitting are closely connected.
The panel needs to reach the installation stage with the correct shape, finished edges and required cut-outs already incorporated. Once the glass has been toughened, these details cannot simply be changed during fitting.
Precision cutting allows sockets, switches, corners and other features to be incorporated cleanly into the finished piece.
Careful fitting then brings the glass together with the rest of the interior. Wall condition, fixing material, alignment and the relationship with neighbouring surfaces all influence how the finished splashback will look and perform.
This becomes particularly important in design-led kitchens and bathrooms, where the glass may sit alongside stone worktops, fitted cabinetry, appliances, lighting and other carefully selected materials.
The strongest installations are those where the glass feels like a considered part of the wider interior rather than a separate panel added afterwards.
Glass splashbacks are one example of how internal glazing can combine practical requirements with light, colour and carefully integrated interior detailing.
A Precise Approach to Bespoke Glass Splashbacks
At Sky Bespoke Glass, we cut and fit bespoke glass splashbacks for kitchens, bathrooms and interior feature areas.
As specialists in bespoke architectural glass, we approach each splashback as part of the wider space. We consider how the finished glass will sit alongside cabinetry, worktops, sockets, wall finishes, lighting and surrounding materials, with attention given to the details that influence the final appearance.
Our team works with homeowners, designers, architects, contractors and commercial clients across London and the Home Counties.
If you are considering a made-to-measure project, you can explore our bespoke glass splashbacks and the different colours, finishes and design possibilities available.
Glass Splashback Fitting Frequently Asked Questions
What adhesive is used to fit a glass splashback?
A glass splashback should be fitted with an adhesive or fixing material compatible with both the glass finish and the surface behind it.
The appropriate product can vary, particularly with painted or decorative glass, so the relevant manufacturer’s guidance should be followed rather than assuming that any general-purpose adhesive is suitable.
Does a wall need to be perfectly flat for a glass splashback?
Not necessarily, but it does need to provide a stable and suitable surface for the rigid glass panel.
Minor variation may be manageable, while more significant unevenness can affect how the splashback sits and may need to be addressed before fitting.
Can a glass splashback be fitted directly over tiles?
It can be possible where the existing tiles are secure, clean, stable and sufficiently flat.
The fixing system must also be suitable for the tiled surface. Loose, damaged or heavily uneven tiles may require further preparation first.
Can toughened glass be cut for a socket after it has been made?
No. Socket openings, holes, notches, and other alterations must be completed before the glass is toughened.
Once toughened, the finished panel cannot simply be cut or drilled during installation.
How are sockets accommodated in a glass splashback?
The required socket or switch cut-outs are incorporated into the glass before toughening. During fitting, the finished splashback is positioned so that these openings align with the relevant electrical fittings.
Is a professional fitting necessary for every glass splashback?
Not necessarily. Some straightforward pre-cut panels may be suitable for competent DIY installation.
Careful professional fitting becomes more valuable where the glass is large or shaped, contains several cut-outs, or requires particularly precise alignment with the surrounding interior.
